
This is a simple guide for regular people, for those who need a VPN for some good purposes. For example, accessing what they don’t let you access, bypassing various stupid censorship and finally, hiding your tracks on the network a bit.
My mini-guide is designed for a person from the street, without special geek experience, but feeling quite comfortable in the world of computers. If you have clarifications, explanations and other corrections simplifying the understanding process — write in comments and I’ll add to the main text.
The plan is:
- Raise a suitable droplet on DigitalOcean
- Add VPN to this droplet
- Configure your computer for access through this VPN
Raising a droplet
First thing is to get yourself an account on DigitalOcean. This can (and should ;) be done via my referral link and get 2 months free, or directly from their site. The price is $5/month. For this money you get 1TB of traffic per month, which in practice is more than enough. In principle even a quarter of this is enough for a normal person per month, which means you can team up with friends/colleagues and use a shared VPN droplet for a whole group of comrades.
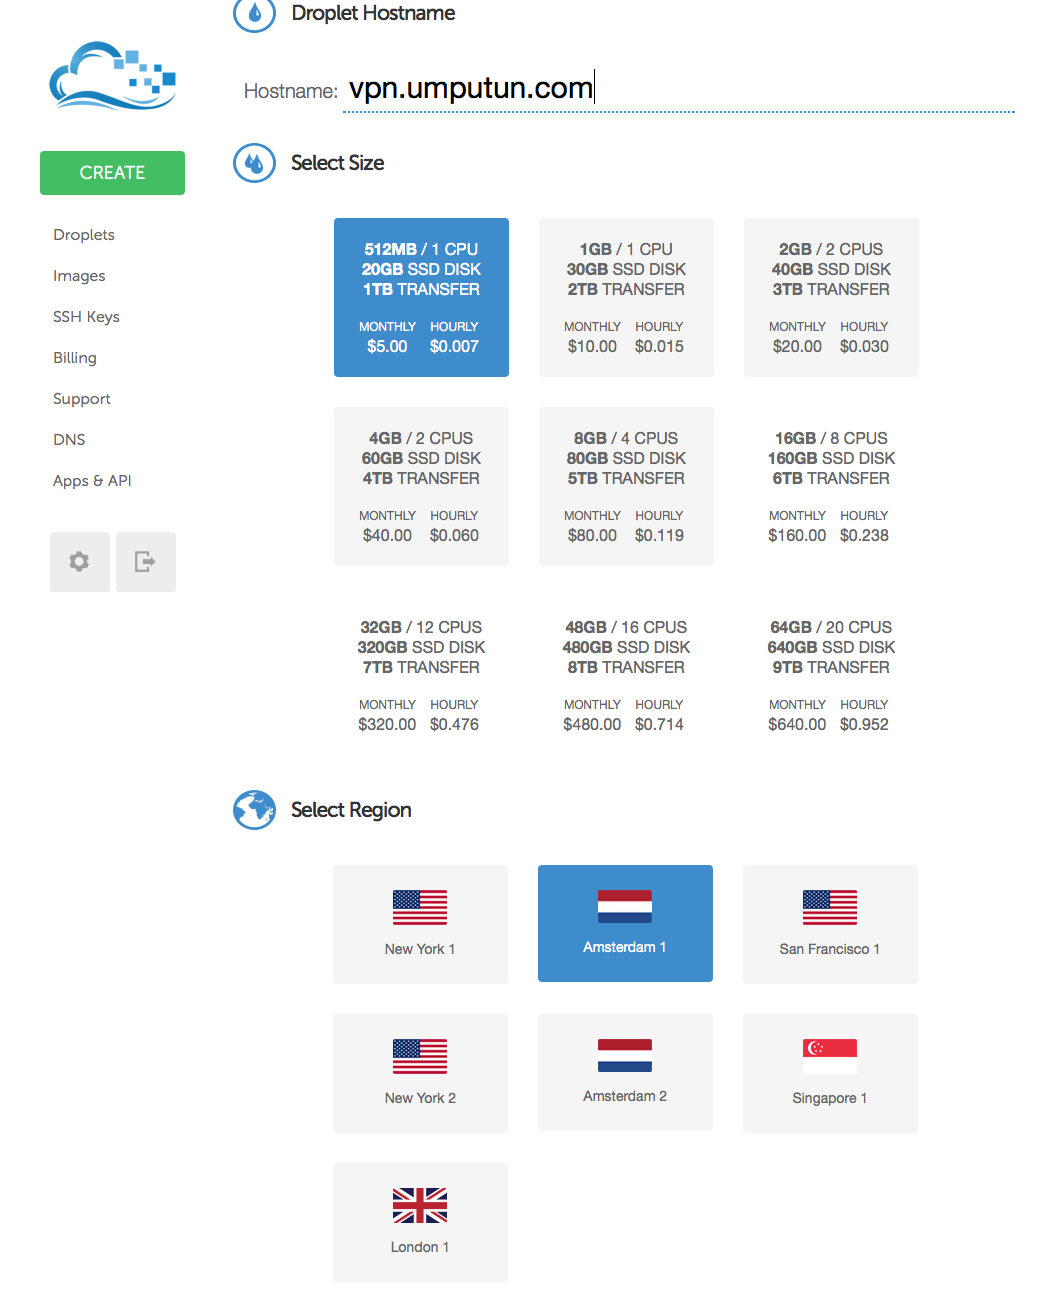
Next we launch a new droplet by clicking the green “CREATE”. Give it some name (any) to your taste. I, for example, gave mine “vpn.umputun.com”. Choose (in “Select Size”) 512MB/1CPU, and in “Select Region” the place where you want to locate your VPN. If you don’t care about access to resources that only work from the US, then it’s most reasonable to choose a region close to you (Amsterdam or London for residents of the former USSR).
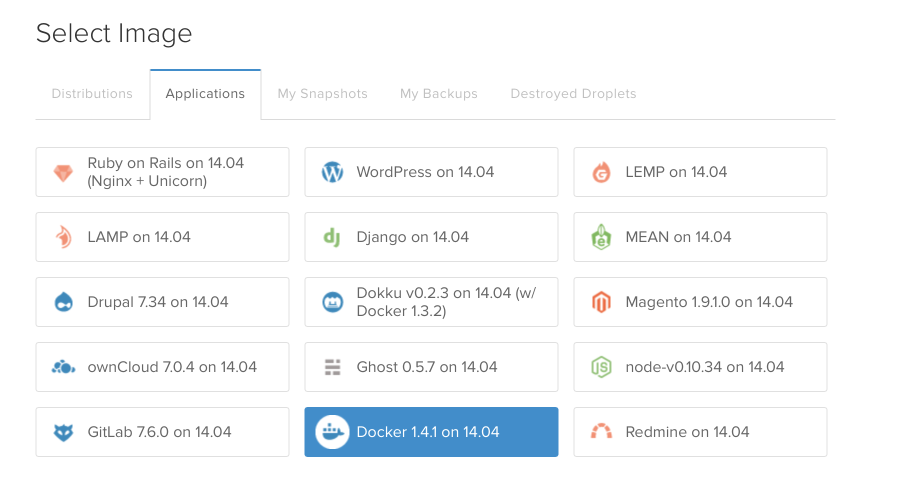
In the “Select Image” section go to “Applications” and there select “Docker 1.4.1 on Ubuntu”
After that click “Create Droplet” and wait a minute (sometimes a bit more) while it creates.
Adding VPN to our droplet
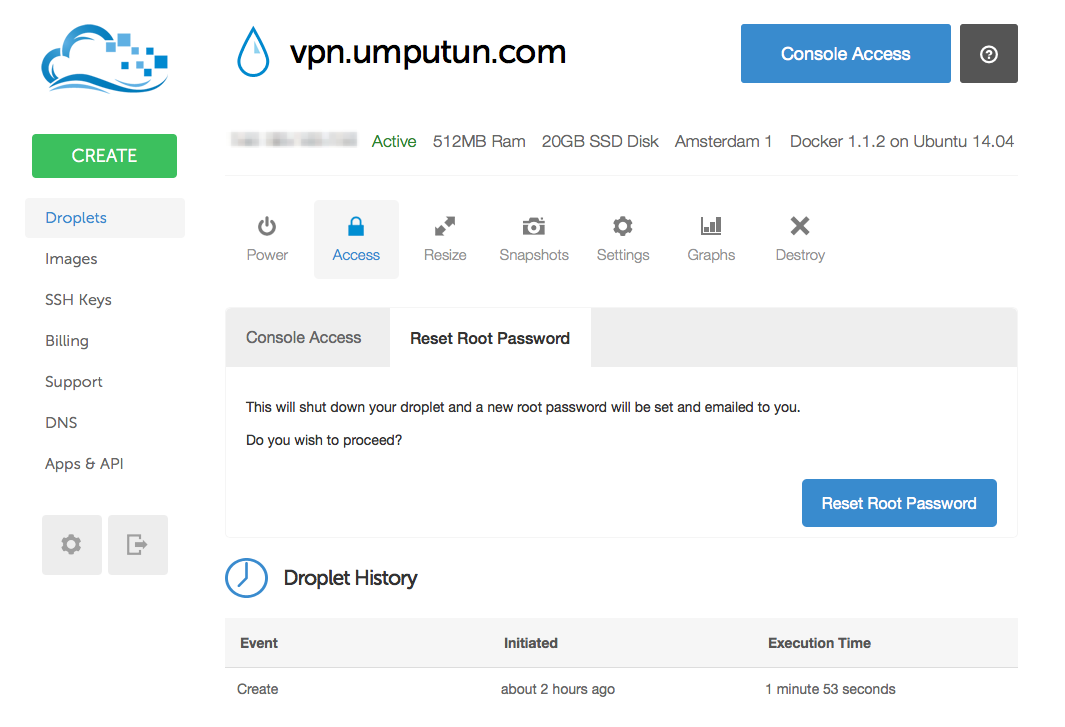
First thing is to log into the console of the newly created droplet. This sounds scary, but in reality everything is very simple. By this point you should already have received an email with the password. If for some reason it didn’t arrive, in the Droplets list find our freshly-created one, select Access and ask to “Reset Root Password”.
In a couple of minutes the password will arrive in email and we’re ready for access. Click “Console Access” and at the “login” prompt enter root, and at the Password prompt — the password received in email.
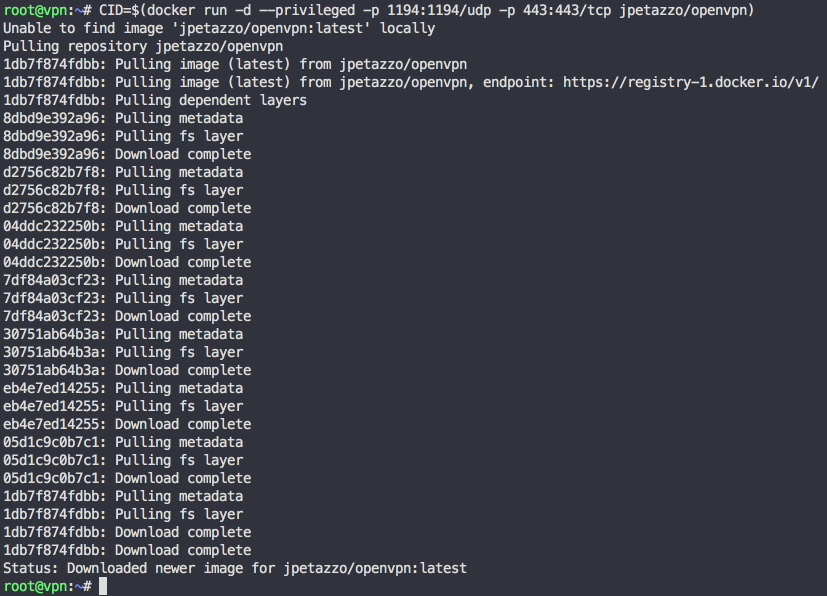
In our console create a VPN server by typing this and pressing Enter:
CID=$(docker run -d --restart=always --privileged -p 1194:1194/udp -p 443:443/tcp umputun/dockvpn)
This will work for several minutes showing minimal signs of life. Don’t worry, it will do everything needed and exit.
Next step do this:
docker run -t -i -p 8080:8080 --volumes-from $CID umputun/dockvpn serveconfig
It should output something like https://1.1.1.1:8080/ (you’ll have a different address). Take this string and enter it in your browser. It (depending on browser) may complain about the certificate and ask for confirmation, which should be given. After that a file will download which we’ll need in the next, final stage. For now press Ctrl-C in the console and move to the last step.
If you entered the address in the browser and the file didn’t download — try running docker run -t -i -p 8181:8080 --volumes-from $CID umputun/dockvpn serveconfig and then open https://1.1.1.1:8181/, might help.
Establishing VPN connection
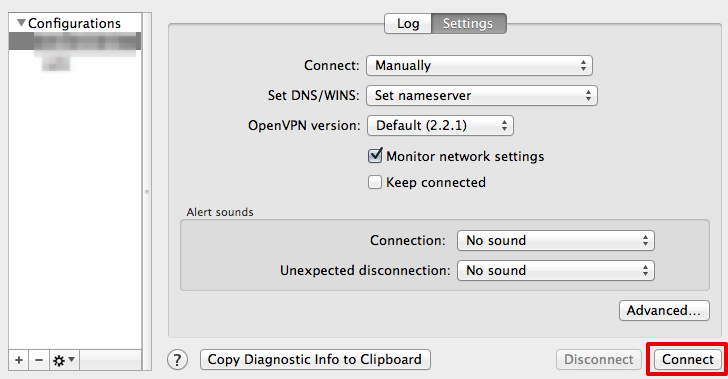
We’ll need to install an OpenVPN client for your platform. I installed Tunnelblick on Mac, but clients exist for all other systems too. And on this site is a clear and detailed instruction for installation for windows.
After that rename the file we downloaded in the previous stage to vpn.ovpn and click on it. This will add our newly created server to your newly installed client program and prepare everything that needs preparing. In the process, depending on your OS and installed OpenVPN client, it may ask to agree with this and that and ask a couple of questions to which boldly answer “Yes”.
Actually that’s all. Click Connect and we’re connected.
Now you can verify that everything works. If you go to wanip.info it will show you the whole truth, namely that you’re connected from your VPN server address and, from the point of view of all sites, are coming from Amsterdam/London/NY depending on what you chose in “Select Region” in the first stage.
To connect additional computers simply repeat the last step. Yes, and keep in mind that distributing your vpn.ovpn file to the whole internet is not a good idea. 1TB is of course a lot, but not so much that it’s enough for everyone.
If after connecting you can’t connect to anything, then possibly there are DNS problems on DigitalOcean’s side. Personally I never had such problems, but in comments people complained. To fix this open the downloaded file (vpn.ovpn) and add to it the line dhcp-option DNS 8.8.8.8.
the image umputun/dockvpn is a copy of jpetazzo/openvpn from his fresh sources. The only reason why I built it is that the author doesn’t build it automatically and the latest changes didn’t appear there automatically.
Last update: July 1, 2015 (for umputun/dockvpn with long key)
This post was translated from the Russian original with AI assistance and reviewed by a human.